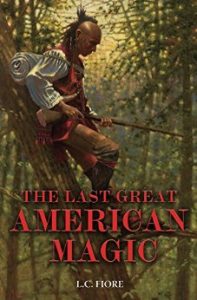
The Rundown
The Recommendation
The Rating
The Links
The Reviewer
Katie Rose Guest Pryal
Visit Katie Rose Guest Pryal‘s website.So you’ve decided you want to send a newsletter to help you connect with your readers. You’ve created a Mailchimp (or other) account. You taught yourself the software. You’re totally ready to do this.
There’s just one problem.
What on Betelgeuse do you write in your newsletter? I mean, really. Authors are supposed to post to Facebook, Tweet, keep a blog, write guest posts (ahem), and now send out newsletters, too!? When are we supposed to write our actual books?
I’m about to give you a no-fail newsletter formula that will make sending out your author newsletters as painless as it can possibly be.
Step 0. Become super familiar with your newsletter software. This is important. You don’t want your software to stand in the way of your newsletter success. I’m going to write these instructions based on the presumption that you have already read the Mailchimp tutorials and watched the YouTube video guides. (Mailchimp is what I happen to use. There are other newsletter platforms out there that are also good.)
OK. No that you are a pro (okay, semipro) with your newsletter software, let’s talk about what you want to put into your newsletter.
Step 1. Create a title and a theme. A newsletter is much easier to write if you have a starting point. It is also much more interesting for people to read—that is, people are much more likely to open the newsletter—if they know what they are getting. By giving your newsletter a title and a theme, then you are doing yourself a favor, because you have a starting place when it comes time to write your newsletters, and you are doing your readers a favor, because they know what to expect. The title of my newsletter is "Writing Isn’t Sexy,” and the theme is how, although it may seem like the writing life is glamorous, it really is so, so not. I created header art for my newsletter, and it’s the same every month. Again, the consistency is for my readers, so they know what they are getting.
Step 2. Break your newsletter into sections, and then use those sections every time. Just like having a theme, having consistent, predictable sections in your newsletter helps your readers know what to expect in your newsletter. Here’s an example of what might be a newsletter’s sections:
(1) Main story of the month.* This is a large box.
(2) Books update. This is a medium box.
(3) Recommended Reads and Book Deals. This is a medium box.
(4) Short Bio (of you). This is a small box.
(5) Social Media Links (yours). This is a small box.
What’s with the “boxes”? Mailchimp lets you design a newsletter by using templates, and within those templates you use drag-and-drop elements such as text boxes to create your newsletter design. Each one of those sections up there is a drag-and-drop element in Mailchimp. I made recommendations for how big each of the sections should be in the list above. Once you’ve laid out your newsletter, you can start filling in the sections.
* Sending a newsletter out monthly seems to be the sweet spot based on all of the research I’ve done. If you send it more frequently, reader feel like they’re getting SPAMmed. If you send it less frequently, readers lose touch with who you are.
Step 3. Fill in your sections. But here’s the deal: when you fill in your sections, you will use templates for most of them, which makes your job easier. And you will—repeat after me—keep it short.
One more time: Keep it short.
The greatest thing about writing a newsletter is that you don’t have to write much at all. Readers don’t want to receive long emails. NO ONE EVER wants to receive a long email. Do you? No. Think about how you feel when you open an email and the bottom of it drops off the screen. You heart sinks. You roll your eyes. You wonder how this person missed the boat on email etiquette.
All of the rules that say short is better when it comes to email work in your favor. Your newsletters should be short, and they should be fun. They’re basically Facebook updates that land in peoples’ inboxes.
Let me explain how this works, using the sections I outlined above.
(1) Main story of the month*
The main story can be anything, so long as it is tied to your newsletter's theme. Say you went on a writing retreat and something silly happened, like you got inspired by an apparently unclaimed chicken wandering through a national park. (That happened to me.) Say you went on a road trip through an unfamiliar state with your family and had some thoughts about that (ditto). Whatever it is that you write for your main story, you need to do three things: keep it short (like 300 words), provide a fun picture, and relate it to the theme of your newsletter. The picture helps capture the attention of your readers, so try to provide one.
(2) Books update
If you’d like, you can have a separate, SUPER short section where you provide an update about your books. Create a graphic with all of your book covers and use it in every newsletter. (Here’s where templates in Mailchimp are helpful.) In ONE sentence, give an update about your writing. “Nearing the end of the sequel to [Book Title Here]!" or something like that. Because the book graphic rarely changes (only when you have a new book), this section is easy to write.
(3) Recommended Reads and Book Deals
Here’s where you provide a service to your readers while, at the same time, you get to come across as super not self-centered. Scroll through the book-deal emails and the Kindle deals. Find a book that you love that’s on a price break, and recommend it in this section of your newsletter. Include the book cover graphic, too.
Look what you just did! You just helped your readers find a book on sale by an author they might not know! You’re SO HELPFUL. I love your newsletter! You're so generous and selfless and fun!
Seriously.
(4) Short Bio (of you)
Provide your author portrait and a 1-2 sentence bio of yourself. This doesn’t really change much from month-to-month. Be sure to update it as new books come out. But you can just leave it be so long as your bio hasn’t changed and you haven't dyed your hair purple. (Um.)
(5) Social Media Links (yours)
Be sure to have all of your social media links tied in to your newsletter, including a link to your website. This is another part of your newsletter that doesn’t change unless, for some reason, you change the URLs of your social media.
Summing up
As you probably figured out, the hardest part of writing the newsletter is coming up with your main story each month. To help with this, I have a blank note where I jot down possible ideas throughout the month. That way, when it is time to write my main story, I have many options to pull from. (The rest of the ideas I use as blog posts.) And remember: keep it short.
The books update is easy. If nothing has changed since the month before, just leave it as it was. (But I bet you can come up with a one-sentence update about your books.)
The book recommendation is actually fun to write because you get to go see what books are on sale and recommend one. Extra tip: Forward your newsletter to the author of the book whose book you recommended. You might make a new friend that way.
Your bio and social media links pretty much stay the same so long as nothing has changed, so that content needs little attention from you.
Thus: if you add up the work required here, you have 300 words plus a picture for your main story, one sentence for your book update, and one book recommendation. That’s it. That’s your total newsletter writing labor—once you have laid the groundwork.
See? You can totally write a newsletter.
(Betelgeuse is the second-brightest star in the constellation Orion. Winter is coming, after all.)